How To Configure Office 365 on Android
Follow the steps below for how to configure Office 365 on Android.
App Drawer
Open the App Drawer, and then tap the Settings app.
Settings Menu
From the Settings menu, tap Add Account. (It may be located under Accounts & Sync.)
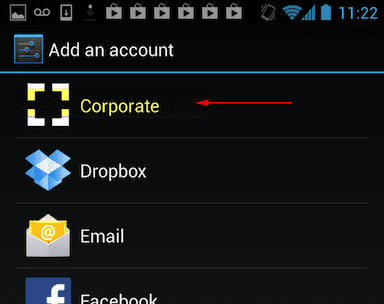
Email Type
Specify email type: click Corporate or maybe listed as Exchange ActiveSync.
Email address
Enter your email address and password, and then tap Next.
Enter Exchange Server Information
Domain: <the user’s domain> (i.e. If the user’s email address is [email protected], enter domain.com)
Server: outlook.office365.com
Ensure that Use secure connection (SSL) and Accept all SSL certificates check boxes have been selected. Tap Next to verify settings.
Verification
Please wait, while your device verifies the server settings. If this steps fails double check server settings, retype password and try again.
IT Policy
If everything is correct, you will be asked to accept the IT policy for your company. Tap OK or you will not be able to sync mail.
Sync Options
Choose a syncing option and frequency, and then tap Next.
Account Name
Name your email account, and then tap Next.
IT Policy Activation
From here, you will be prompted to activate your company IT policy. Tap Activate or you will not be able to sync mail.
Once you complete these steps, you may open your Email app and mail will begin to download. This process will take a few minutes depending on your connecting speed and amount of data.